| 
               Exporting
              from Architectural Studio to Architectural Desktop 3.3 


                    | 
                       
                        Note:
                        You must open Autodesk Architectural Desktop 3.3 to a
                        new drawing space and run it simultaneously with
                        Autodesk Architectural Studio software. (This tutorial
                        uses the Aec arch [Imperial-intl].dwt template.)
                       
                     | 


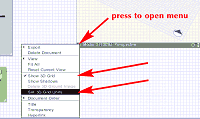
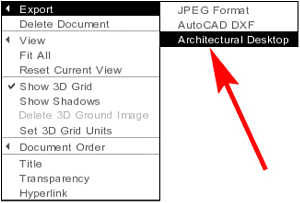
              1. Using the
              pointer tool, click the triangle at the lower left of the 3D
              workspace and select Export > Architectural Desktop from the
              drop-down menu (see Figure 11).
                 
              Figure 11: Select Export > Architectural Desktop from the 3D
              workspace drop-down menu. 
              2. The ADT
              Export dialog box appears; click the Yes button to export (see
              Figure 12).
                 
              Figure 12: Note the ADT Export dialog box. Autodesk
              Architectural Desktop 3.3 must be running. 
              You have now
              exported your model to Autodesk Architectural Desktop 3.3
               Using
              Your Autodesk Architectural Studio Model in Autodesk Architectural
              Desktop 3.3 
              1. Maximize Autodesk Architectural Desktop.
               2. Change to
              the Mass-Group Layout.
               3. Activate
              the right viewport (Concept Mass representation set).
               4. Select
              Concept > Slice Floorplates > Generate Slice from the main
              menu.
               5. Enter 5
              at the command line for the number of slices, and press the Enter
              key.
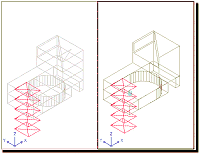
               6. Place a
              Slice rectangle (size and location doesn't matter), accept default
              rotation, accept default starting height of 0", enter 10'
              for Distance between slices, and press the Enter key to complete
              the command (see Figure 13).
                 
              Figure 13: Generate five slice rectangles. 
              (click image to enlarge) 
              7. Select
              all the Slice rectangles created by the previous command,
              right-click, and select Attach Objects from the contextual menu.
               8. Select
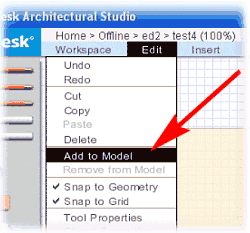
              the imported Mass Object (it should be one element because you
              used the Added to Model option in Autodesk Architectural Studio to
              make it one piece), and press the Enter key to complete the
              command.
               9. Change to
              the Work-FLR layout, and set the view to SW Isometric.
               10. Press
              the Layers icon to open the Layer Properties Manager dialog box.
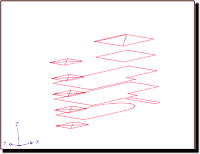
               11. Freeze
              the A-Mass and A-Mass-Grps layers (see Figure 14).
                 
              Figure 14: Freeze the A-Mass and A-Mass-Grps layers leaving the
              floor slices. 
              (click image to enlarge) 
              12. From the
              main menu select Concept > Space Boundaries > Convert to
              Boundaries.
               13. Enter SL
              (for SLICE) in the command line and press the Enter key.
               14. Select
              all the slice rectangles and press the Enter key to open the Space
              Boundary Properties dialog box.
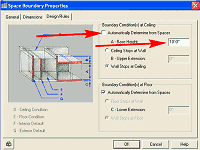
               15. In this
              dialog box, clear the Automatically Determine from Spaces check
              box, and enter 10' in the A- Base Height input box (see
              Figure 15).
                 
              Figure 15: Set the space boundaries to be 10' high. 
              (click image to enlarge) 
              16. Press
              the OK button to create the Space Boundaries.
               17. Select
              the 3D Orbit icon from the main toolbar and right-click, which
              opens a contextual menu.
               18. Select
              Projection > Perspective from that menu to place the structure
              in Perspective.
               19.
              Right-click again and select Shading Mode > Flat Shaded from
              the contextual menu that appears.
               20. Press
              the Enter key to exit.
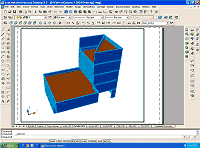
               You have now
              completed the transition from massing design in Autodesk
              Architectural Studio to the construction document stage in
              Autodesk Architectural Desktop software (see Figure 16).
                 
              Figure 16: The space boundaries are ready to be converted into
              walls. 
              (click image to enlarge) 
              In
              Conclusion 
              The use of massing studies is unique to both Autodesk
              Architectural Desktop and Autodesk Architectural Studio software.
              Used in combination, they influence and add productivity to both
              the design stage and the development of construction documents.
              The Architectural Studio model does not have to be perfect; it is
              only the start. In Autodesk Architectural Desktop 3.3 you can
              quickly add and/or modify all the particulars of the building.
               Good Luck! 
               
             |