by: Nancy Fulton
URL: http://localhost/gotoPointA.jsp?dest=2_2fultadt
|
Introduction You'll learn how to:
Creating
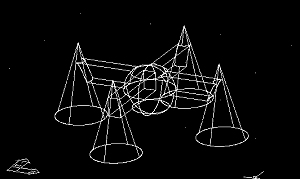
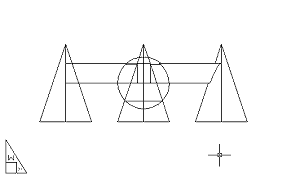
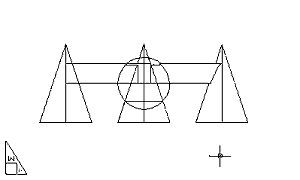
Multi-View Block Components from a 3D Model You view the model from the top and side, and use the WMFOUT command to export each of the views as 2D geometry. You then use the WMFIN command to import the 2D geometry back into the drawing and edit it. Finally you use the block command to turn the 3D model, the front view and the top view into three independent blocks. Later you use the three blocks to create a Multi-View block. Prior to proceeding with this lesson, open the 9915a.dwg.
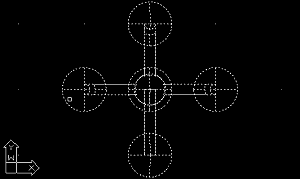
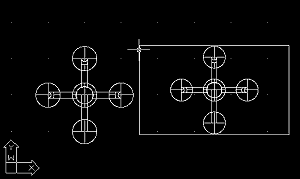
1. From the View 3D views menu, choose Top. 2. From the File menu, choose Export. 3. From the Save as type list, choose Metafile (*.wmf). 4. In the File name box, type Top. 5. Choose Save to save the WMF file. 6. Select all the components of the 3D model.
7. Press ENTER to indicate that you don't want to select any more objects. You have just created a 2D representation of the top view of the 3D model and stored it in a file called top.wmf. 8. From the View 3D Views menu, choose Top. 9. From the View Zoom menu, choose Realtime. 10. Click and drag out to display some space around the 3D model. 11. Right-click in the drawing area and choose Exit.
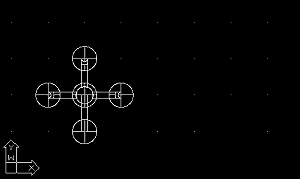
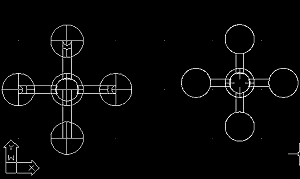
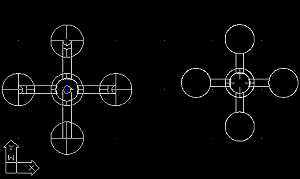
12. At the command prompt, type WMFIN. 13. Select the top.wmf file created earlier. 14. Choose Open to open the .wmf file. 15. Click to place the upper right corner of the .wmf file. 16. Press ENTER three times to insert the block.
17. On the Modify toolbar, choose Explode. 18. Select the edge of the object you just inserted. 19. Press ENTER to indicate that you don't want to select any more objects. 20. On the Modify toolbar, choose Explode. 21. Select the objects you just exploded. 22. Press ENTER to indicate that you don't want to select any more objects. You exploded the object twice to make sure you could select, edit or delete all its components. 23. Delete the border around the block and any other lines you want to remove. Add to or scale the geometry if desired.
You will find a version of the drawing file to this point in 9915b.dwg.
|
|
Creating
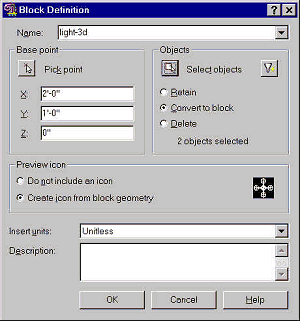
Blocks 1. From the Draw toolbar, choose Make Block. 2. In the name box, type light-3D. 3. Select the Pick point icon. 4. Select a point in the center of the 3D lamp.
5. Choose the Select Objects icon. 6. Select two points to select all the 3D geometry.
7. Press ENTER to indicate that you don't want to select any more objects.
8. Choose OK to exit this dialog box and create the block 9. Use the techniques just demonstrated to create a light-top block using the top geometry you created earlier. You will find a version of the drawing to this point in 9915c.dwg. Defining
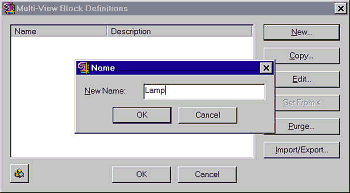
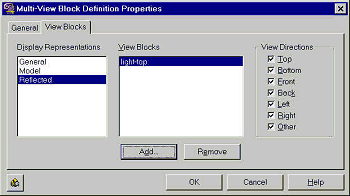
Multi-View Blocks 1. From the Design Design Content menu, Define Multi-View Block. 2. Choose New. 3. Type Lamp in the Name box.
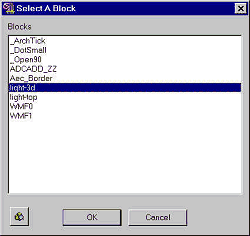
4. Choose OK to exit the Name window. 5. Choose Edit to edit the Multi-View block definition. 6. Choose the View Blocks tab. 7. Select the General button. 8. Choose Add. 9. Choose light-3D.
10. Choose OK.
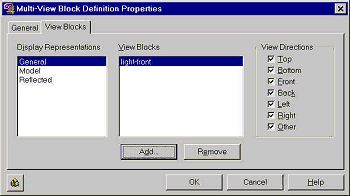
11. Choose Model. 12. Choose Add. 13. Choose the light-3D block. 14. Choose OK to exit this window. 15. Select Reflected. 16. Choose Add. 17. Select light-top. 18. Choose OK.
19. Choose OK. 20. Choose OK to exit the Multi-View Block Definition box. You have just created a Multi-View block. You will find a version of the drawing to this point in 9915d.dwg.
|
|
Inserting
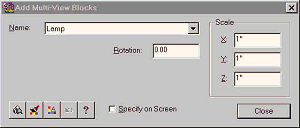
a Multi-View Block 1. Select the blocks you created in the previous lessons. 2. Press the Delete button to delete the objects. 3. Select the Work-3D tab. 4. From the Design Design Content menu, choose Add Multi-View Block. 5. Choose Lamp from the list of blocks.
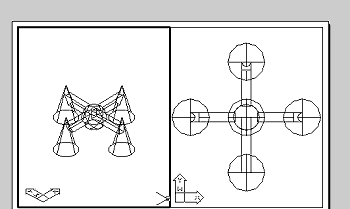
6. Select a point in the left viewport to create Lamp. 7. Choose Close to exit this window. 8. From the View Zoom menu, choose Extents. 9. Click in the 3D View. 10. From the View Zoom menu, choose Extents.
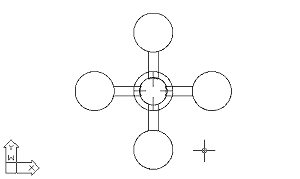
11. Select the Plot-RCP layout. 12. From the View Zoom menu, choose Window. 13. Select two points to put a window around the model. Note that it shows the block you assigned to the Reflected display representation in the previous lesson.
14. Select the Plot-SEC tab. 15. From the View Zoom menu, choose Window. 16. Select two points to put a window around the block in any view. Note that the view correctly displays the side view of the 3D model.
You will find a version of the project to this point in 9915e.dwg. Exporting
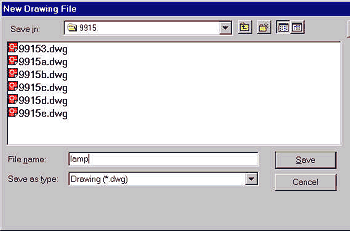
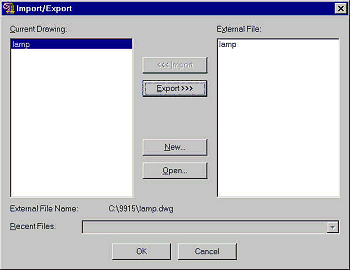
a Multi-View Block for Use in Other Drawings 1. From the Design Design Content menu, choose Create Multi-View block. 2. Select Lamp. 3. Choose Import/Export. 4. Choose New. 5. Specify the name of the symbol. Make sure to specify the folder in which the symbol should be placed.
6. Choose Save to create the file. 7. Choose Export to write the lamp block out to the file.
8. Choose OK to exit the Import/Export dialog box. 9. Choose Yes to save your changes. 10. Choose OK to exit the Multi-View Block Definitions dialog box. Now that you have created, placed and exported a Multi-View block, you should be ready to start building your own Multi-View block library.
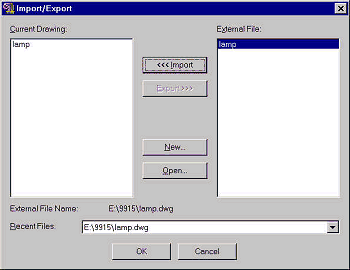
Save the lamp.dwg drawing file onto your local hard disk, then import it into your drawing. |
Nancy Fulton is president and founder of OpenCAD International Inc, publisher of the Complete Support for AutoCAD, 3D Studio MAX and 3D Studio VIZ Websites. Her web and CD based curriculums are used in high schools, colleges and universities around the world. She develops training material for Autodesk and writes articles for CADALYST Magazine. She learned to use AutoCAD on Release 9, and served as support consultant and instructor for dealers, authorized training centers and distributors before starting her own business in 1990.