| The
advantage of using Autodesk® Architectural Desktop is that many of its
objects, such as doors, walls, and windows, have multiple ways of
displaying themselves. For example, if you draw a door and a wall in
plan view, you can easily extract an elevation or a section from your
designs--without having to redraw everything and use Layer Manipulation.
But did you know that Autodesk Architectural Desktop doors also have a
Threshold Display that you can easily turn on and off in your Standard
Plan View in order to create exterior doors? With a working
understanding of Display Representations, this is possible.
In this example,
we have a specific door that we'd like to add a threshold to. The first
step would be to find this door's Threshold Representation and turn it
on. To do this, simply highlight the door and right-click. Now you
should see the context-sensitive menu for Doors. Next, choose Entity
Display (see Figure 1).
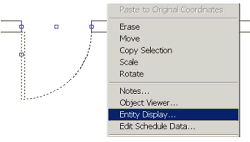
Figure 1: Choose Entity Display from the context-sensitive menu.
When the Entity
Display Dialog Box opens, click on the Display Props Tab and scroll down
to Threshold Plan* (see Figure 2).
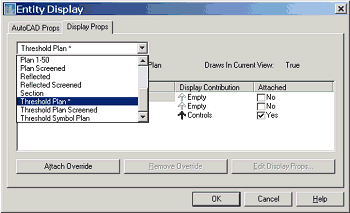
Figure 2: Scroll down to Threshold Plan* in the Display Props tab of
the Entity Display dialog box.
When Threshold
Plan* has been set current, you can now attach an override to that
specific door by selecting Door as your Property Source and clicking on
the checkbox in the adjacent Attached column. The override has now been
set. Now click on the Edit Display Props Button in the lower right of
the dialog box (see Figure 3).
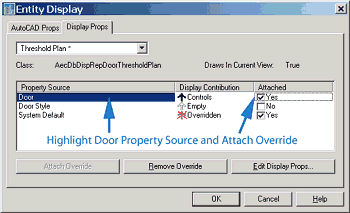
Figure 3: Click on the Edit Display Props button in the lower right
of the Entity Display dialog box.
|
Note:
Attaching an override to Door Style will turn on the threshold for
every instance of that specific Door Style. This is recommended if
you'd like to create a specific style where the threshold is
always visible. Attaching an override to System Default will turn
on the Threshold Representation for every single door in your
design, regardless of style.
|
Once you have
clicked on the Edit Display Props button, you will see two tabs. The
first is the Layer/Color/Linetype tab (see Figure 4).
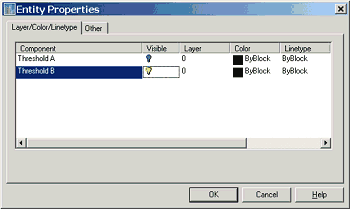
Figure 4: The Layer/Color/Linetype tab of the Entity Properties
dialog box.
This tab allows
you to control the visibility of your threshold. Currently, the
visibility for both thresholds is turned off. For this tutorial, we will
only turn on the visibility of Threshold B, the threshold on the
exterior of the door. Turn on its visibility by clicking on the "lightbulb,"
just as you would do if you were working with AutoCAD Layers. Now click
on the Other tab (see Figure 5).
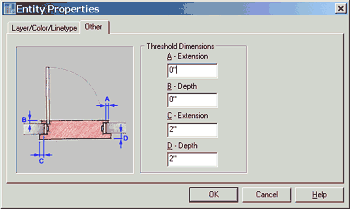
Figure 5: The Other tab of the Entity Display Properties dialog box.
|
Note:
This tab also allows you to specify the Layer, Color, Linetype,
Lineweight, and Ltscale of your threshold.
|
On this tab,
notice the diagram. "C" and "D" control the respective values for the
Extension and Depth of the exterior door threshold. Type in 2" as the
value for both. Click OK. Now that the exterior threshold for the door
has been set, we must specify that we'd like to have the threshold of
the door appear in our drawing's Plan View. To do this, you must go to
the Display Manager.
Go to the Desktop
menu and select Display Manager (see Figure 6).
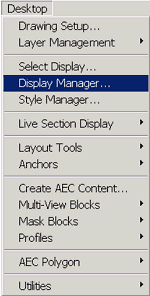
Figure 6: Select Display Manager from the Desktop menu.
Once in the
Display Manager, expand the Representations By Object folder. Scroll
down to Door. You should see all of the available Display
Representations for Doors, including Threshold Plan (see Figure 7).
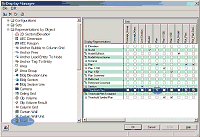
Figure 7: You should see the available Display Representations in the
Display Manager.
(click image to enlarge)
Since we want the
Threshold Representation of our door to appear in the Plan View of the
drawing, scroll down to Threshold Plan in the Display Representations
column and click on the adjacent checkbox for Plan. Click OK. Voila!
You've just created an exterior Door with a threshold (see Figure 8).
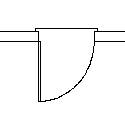
Figure 8: The finished threshold.
If you move the
door or copy it, the threshold remains attached to the door. By taking
advantage of the Style Manager, you can also create your own Door Style
that has a visible threshold and share it with your design team for use
on current and future projects.
|