Mass
Modeling the Architectural Desktop Way
by: Ed Goldberg
URL: http://localhost/gotoPointA.jsp?dest=2_3goldadt
|
Introduction If you have been seeing the term "CAAD" (computer-aided architectural design) lately, it's because "CAD" no longer captures what software can do. AutoCAD Architectural Desktop software offers powerful CAD capabilities and at least three significant building-design tools:
For this tutorial, we'll look only at Mass Elements.
|
|
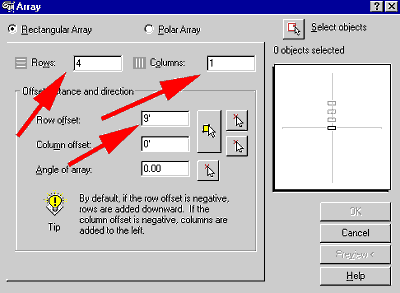
6. Place a 10'x10'x10' Box Mass Element in the viewport, and press Enter twice. 7. Select the box shape and right-click. 8. Select Element Modify from the contextual menu that appears. The Modify Mass Element dialog box then appears. 9. Change the Width setting to 80', the Depth to 40', and Height to 9', then press OK. 10. Change the viewport from Isometric (default) to Front view. 11. Select the Array icon, and create a Rectangular Array with the settings shown in Figure 3. Change the viewport back to SW Isometric view.
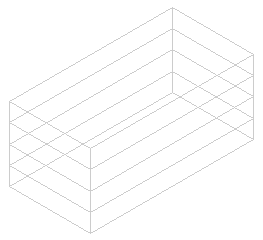
You should now have an 80' x 40' four-story building (see Figure 4).
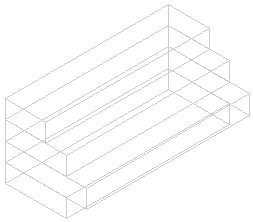
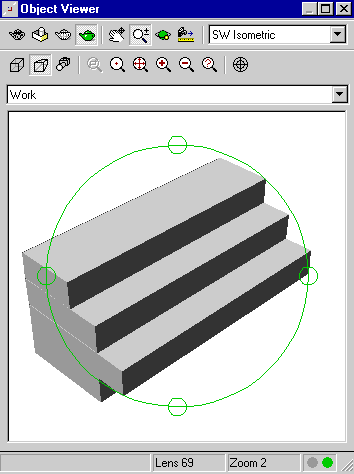
12. Select the Polar button, select the top box in the four-story model, activate the box's grips, and move it towards the rear of the four-story model. 13. The command line now reads STRETCH. Enter 20' on the command line, and press Enter. 14. Move down one box, and repeat the process, moving it back 10'. Don't change the third box. 15. Select the bottom box, and move it back 10' as well. You should now have the form shown in Figure 5. 16. Select all the boxes and right-click. 17. Select the Object Viewer from the contextual menu. 18. In the Object Viewer, press the Gouraud Shaded icon, and the Perspective icon. Also make sure that you select the SW Isometric View from the drop- down list (see Figure 6).
Conclusion Next month we'll take this technique further. |
H. Edward Goldberg, AIA, is a practicing architect and industrial designer, as well as Coordinator of Industrial Design at Towson University in Towson, Maryland. Ed can be reached at h.e.goldberg@verizon.net.


