|
If you
have AutoCAD® 2000 or higher, you have access to one of my all
time favorite commands: QDIM, for Quick Dimensioning. If you're
still churning out your dimensions one at a time you simply must
try this great timesaver.
The basic
concept is simple—you window the group of objects you need to
dimension, select the type of dimensioning you want, and place
the displayed dimensions in the proper location. Super Simple!
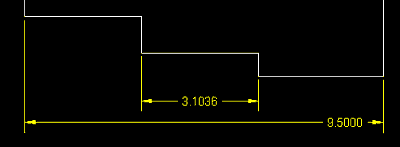
This command is especially powerful at knocking out baseline and
continuous dimensions, but it also does a great job dimensioning
a series of arc or circles (holes). Let's take a look at the
actual QDIM command. If you'd like to follow along, open up a
drawing that's in need of some dimensioning.
Command:
QDIM
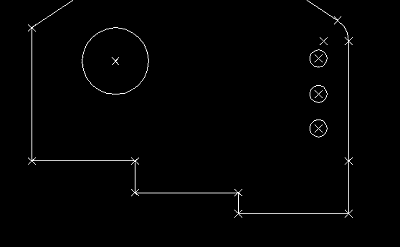
Select geometry to dimension: Select the objects you wish to
dimension
Select geometry to dimension: Enter
Specify dimension line position, or
[Continuous/Staggered/Baseline/Ordinate/Radius/Diameter/DatumPoint/Edit]
<Continuous>:
After you
select the objects you wish to dimension, you can choose between
a variety of different types of dimensioning. I'm fairly certain
you understand Continuous, Baseline, Ordinate, Radius, and
Diameter dimensioning so I'll focus on the other options.
DatumPoint enables you to indicate a new datum point for
baseline or ordinate dimensioning. Staggered is a head-scratcher,
and since the help file does nothing to explain it to you, let's
provide a brief explanation.
Many
dimension standards run into the need to dimension smaller
distances with a larger dimension as shown in Figure 1. The
dimensions ultimately end up stacked on top of each other with
their text staggered from left to right as you ascend the stack.

Figure 1: Many dimension standards run into the need to
dimension smaller distances with a larger dimension.
The Edit
option gives you more control over the final dimensioning
outcome. Here you will find that you can easily add or remove
the various selected points QDIM is going to use to determine
the final dimensions. Figure 2 provides an example of the
various points that show up when you select Edit mode. From the
selection set you simply select the points you wish to add (or
remove).

Figure 2: Simply select the points you wish to add (or
remove).
Once your
dimensions are placed in your drawing, you can easily go back
and change your dimensions from one type to another. Perhaps you
selected Radius but wish you'd selected Diameter. Simply go back
into QDIM, reselect the objects (and the dimensions), indicate
the new dimension type and proper placement and Voila—they
magically update!
I have
some good news and some bad news here (get ready for a big plug
for the AutoCAD Extensions!). These QDIM dimensions are not part
of the new AutoCAD 2002 smart associative dimensions. Clearly
that's the bad news. The good news is that the latest Extension
includes a utility that makes the QDIM dimensions associative
(hoorah!). So after you've become addicted to this awesome
command (and you will become addicted), if you want them to be
extra smart and truly associative, check out the Subscription
program and get your hands on the latest Extension!
Until next
month, happy AutoCADding!
|

